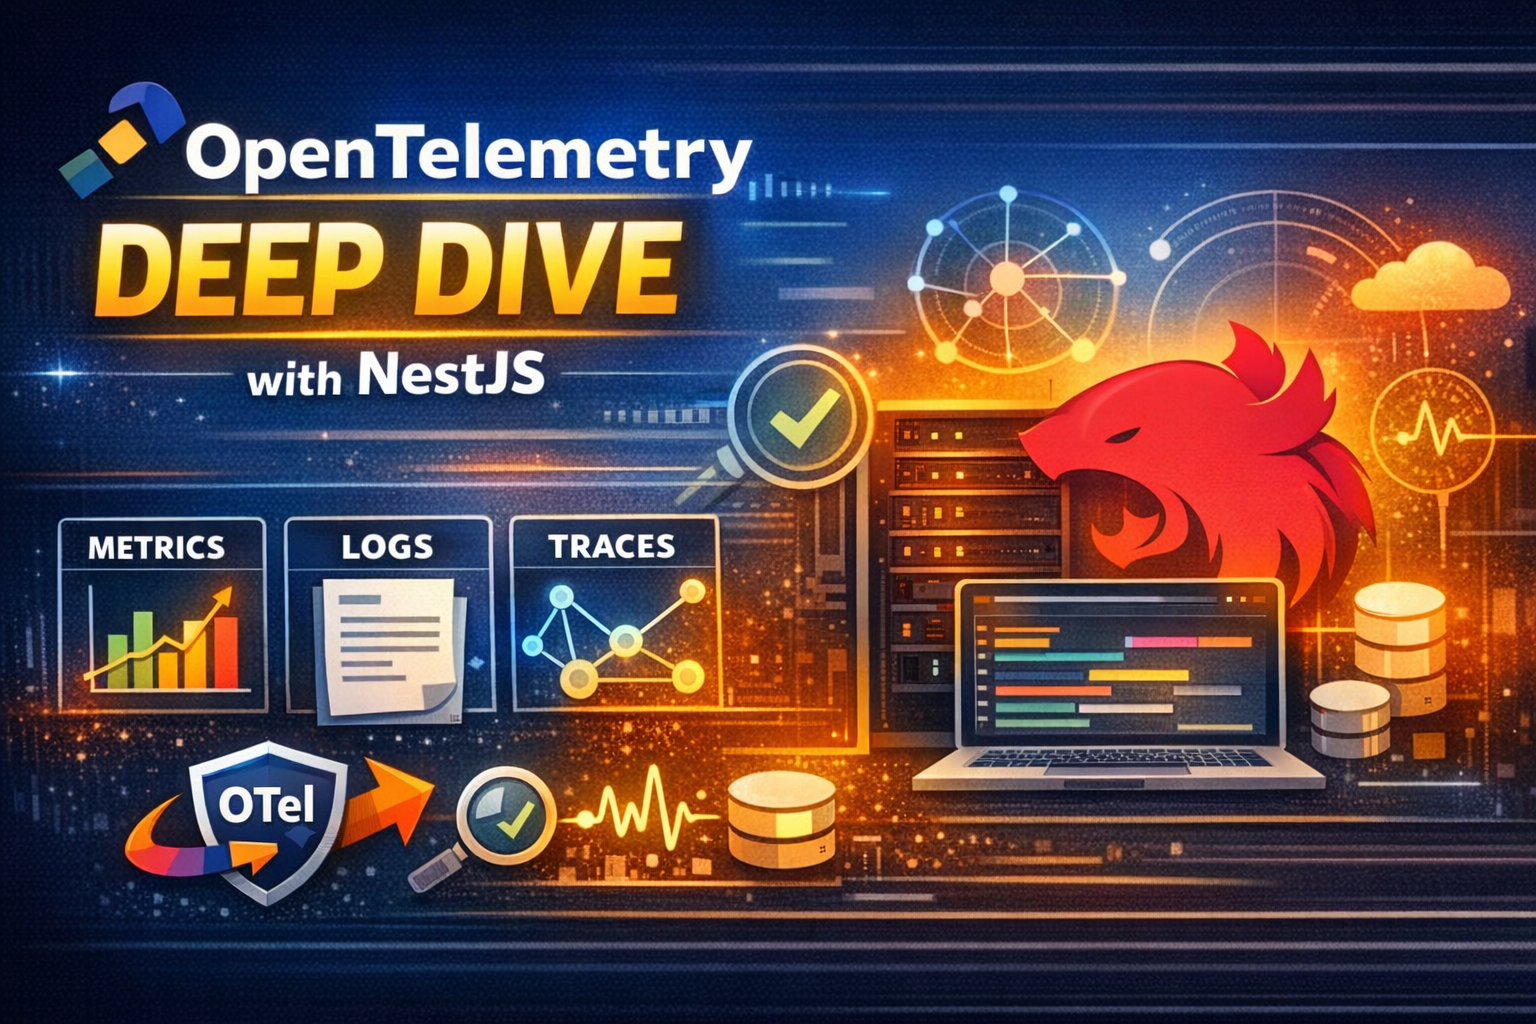
OpenTelemetry Deep Dive - From Fundamentals to Production with NestJS
A comprehensive guide to OpenTelemetry covering its history, core concepts, instrumentation strategies, and real-world implementation with NestJS using all three pillars of observability.

#Introduction
In distributed systems, understanding what's happening across dozens or hundreds of services is like trying to solve a puzzle where pieces are scattered across different rooms. You might know your API is slow, but is it the database, the cache, a third-party service, or network latency? Without proper observability, you're debugging in the dark.
This is where OpenTelemetry comes in. It's not just another monitoring tool—it's a vendor-neutral standard that unifies how we collect, process, and export telemetry data. Think of it as the USB-C of observability: one standard that works everywhere, eliminating the need for proprietary agents and vendor lock-in.
In this deep dive, we'll explore OpenTelemetry from its origins to production implementation, covering manual and automatic instrumentation, core concepts, and a real-world NestJS application that demonstrates all three pillars of observability: metrics, logs, and traces.
#The History: Why OpenTelemetry Exists
Before OpenTelemetry, the observability landscape was fragmented. Every vendor had their own agent, SDK, and data format. If you used Datadog, you installed the Datadog agent. If you switched to New Relic, you ripped everything out and started over. This created several problems:
- Vendor lock-in: Changing observability providers meant rewriting instrumentation code
- Inconsistent data: Different tools measured things differently, making comparisons impossible
- Multiple agents: Running multiple monitoring tools meant multiple agents competing for resources
- Maintenance burden: Each SDK had its own API, requiring teams to learn multiple patterns
#The OpenTracing and OpenCensus Era
Two projects emerged to solve this: OpenTracing (focused on distributed tracing) and OpenCensus (focused on metrics and tracing). Both gained traction, but having two competing standards created its own problems. The community was divided, and vendors had to support both.
#The Merger: OpenTelemetry is Born
In 2019, the Cloud Native Computing Foundation (CNCF) merged OpenTracing and OpenCensus into OpenTelemetry. The goal was simple: create a single, vendor-neutral standard for telemetry data collection. OpenTelemetry became a CNCF incubating project in 2021 and has since become the second most active CNCF project after Kubernetes.
Today, OpenTelemetry is supported by every major observability vendor: Datadog, New Relic, Honeycomb, Grafana, Elastic, AWS, Google Cloud, and Azure. It's the de facto standard for cloud-native observability.
#The Three Pillars of Observability
Observability isn't just monitoring. Monitoring tells you when something is wrong; observability tells you why. The three pillars work together to give you complete visibility:
#Metrics
Metrics are numerical measurements over time. They answer questions like "How many requests per second?" or "What's the 95th percentile latency?" Metrics are cheap to collect and store, making them ideal for dashboards and alerts.
Examples:
- Request count
- Error rate
- CPU usage
- Memory consumption
- Database connection pool size
#Logs
Logs are timestamped records of discrete events. They provide context about what happened at a specific moment. Logs are expensive to store at scale but invaluable for debugging specific issues.
Examples:
- Application errors with stack traces
- User authentication events
- Database query logs
- API request/response payloads
#Traces
Traces show the journey of a request through your distributed system. A trace is composed of spans, where each span represents a unit of work. Traces answer questions like "Which service is causing the slowdown?" and "What's the critical path?"
Example trace flow:
API Gateway (50ms)
  └─ Auth Service (10ms)
  └─ User Service (30ms)
      └─ Database Query (25ms)
  └─ Cache Check (5ms)
Tip
The three pillars are most powerful when correlated. A spike in error rate (metric) can be investigated with logs (what failed) and traces (where it failed).
#OpenTelemetry Core Concepts
Understanding OpenTelemetry requires grasping its architecture and key components.
#The OpenTelemetry Architecture
OpenTelemetry consists of several components:
- API: Language-specific interfaces for creating telemetry data
- SDK: Implementation of the API with configuration and processing
- Instrumentation Libraries: Pre-built instrumentation for popular frameworks
- Collector: A vendor-agnostic proxy for receiving, processing, and exporting telemetry
- Exporters: Components that send data to observability backends
#Signals
OpenTelemetry defines three signal types:
- Traces: Distributed traces with spans
- Metrics: Numerical measurements (counters, gauges, histograms)
- Logs: Structured log records
Each signal has its own API and SDK, but they share common concepts like context propagation and resource attributes.
#Context and Propagation
Context is how OpenTelemetry correlates telemetry across service boundaries. When a request enters your system, OpenTelemetry creates a trace context containing:
- Trace ID: Unique identifier for the entire request flow
- Span ID: Unique identifier for the current operation
- Trace Flags: Sampling decisions and other metadata
This context is propagated through HTTP headers (W3C Trace Context standard), message queues, and other transport mechanisms. This is what enables distributed tracing.
#Resources and Attributes
Resources describe the entity producing telemetry. Common resource attributes include:
service.name: Your application nameservice.version: Application versiondeployment.environment: prod, staging, devhost.name: Server hostnamecloud.provider: AWS, GCP, Azure
Attributes are key-value pairs attached to spans, metrics, and logs. They provide dimensions for filtering and grouping:
span.setAttribute('http.method', 'GET');
span.setAttribute('http.status_code', 200);
span.setAttribute('user.id', '12345');
span.setAttribute('db.statement', 'SELECT * FROM users');#Semantic Conventions
OpenTelemetry defines semantic conventions—standardized attribute names for common scenarios. This ensures consistency across different services and languages.
For HTTP requests:
http.method: GET, POST, etc.http.url: Full URLhttp.status_code: Response statushttp.route: Route pattern like/users/:id
For database operations:
db.system: postgresql, mysql, mongodbdb.statement: SQL query or commanddb.name: Database namedb.operation: SELECT, INSERT, UPDATE
Using semantic conventions makes your telemetry data portable and easier to analyze.
#Sampling
Collecting every trace in a high-traffic system is expensive and unnecessary. Sampling decides which traces to keep. OpenTelemetry supports several sampling strategies:
- AlwaysOn: Sample everything (development only)
- AlwaysOff: Sample nothing
- TraceIdRatioBased: Sample a percentage (e.g., 10%)
- ParentBased: Follow the parent span's sampling decision
Head-based sampling (decision at the root span) is simple but can miss interesting traces. Tail-based sampling (decision after seeing the entire trace) is more sophisticated but requires the OpenTelemetry Collector.
#Manual vs Automatic Instrumentation
OpenTelemetry offers two approaches to instrumentation, each with trade-offs.
#Automatic Instrumentation
Automatic instrumentation uses agents or libraries that inject telemetry without code changes. For Node.js, this is done through the @opentelemetry/auto-instrumentations-node package.
Advantages:
- Zero code changes required
- Covers common frameworks automatically (Express, NestJS, Fastify)
- Instruments third-party libraries (HTTP clients, databases, Redis)
- Quick to set up
Disadvantages:
- Less control over what's instrumented
- May capture too much or too little data
- Can have performance overhead
- Limited customization
When to use:
- Getting started with OpenTelemetry
- Instrumenting legacy applications
- Standard use cases without special requirements
#Manual Instrumentation
Manual instrumentation means explicitly creating spans, metrics, and logs in your code.
Advantages:
- Full control over telemetry data
- Can add business-specific context
- Instrument custom logic and algorithms
- Optimize for performance
Disadvantages:
- Requires code changes
- More maintenance burden
- Easy to forget instrumentation
- Steeper learning curve
When to use:
- Business-critical paths that need detailed visibility
- Custom algorithms or workflows
- Performance-sensitive code where you need control
- Adding domain-specific context
#The Hybrid Approach
In production, you'll typically use both. Automatic instrumentation provides baseline coverage, while manual instrumentation adds business context and custom metrics.
// Automatic: HTTP requests are traced automatically
@Get('/users/:id')
async getUser(@Param('id') id: string) {
  // Manual: Add business context
  const span = trace.getActiveSpan();
  span?.setAttribute('user.id', id);
  span?.setAttribute('user.tier', 'premium');

  // Manual: Custom metric
  this.userFetchCounter.add(1, { tier: 'premium' });

  return this.userService.findOne(id);
}#OpenTelemetry Collector: The Swiss Army Knife
The OpenTelemetry Collector is a vendor-agnostic proxy that receives, processes, and exports telemetry data. Think of it as a data pipeline for observability.
#Why Use the Collector?
Without the collector, each application exports directly to backends:
App 1 → Datadog
App 2 → Datadog
App 3 → Datadog
This creates problems:
- Applications need backend credentials
- Changing backends requires updating all applications
- No centralized processing or filtering
- Network overhead from many connections
With the collector:
App 1 ↘
App 2 → Collector → Datadog
App 3 ↗
Benefits:
- Centralized configuration
- Backend credentials stay in the collector
- Process, filter, and enrich data before export
- Send to multiple backends simultaneously
- Reduce application overhead
#Collector Components
The collector has three types of components:
Receivers: Accept telemetry data
- OTLP (OpenTelemetry Protocol)
- Prometheus
- Jaeger
- Zipkin
Processors: Transform and filter data
- Batch: Group data for efficient export
- Filter: Drop unwanted telemetry
- Attributes: Add, remove, or modify attributes
- Tail Sampling: Sample based on trace characteristics
Exporters: Send data to backends
- OTLP (to other collectors or backends)
- Prometheus
- Jaeger
- Zipkin
- Datadog
- New Relic
- Logging (for debugging)
#Collector Deployment Patterns
Agent Pattern: Collector runs as a sidecar or daemon on each host
App → Collector (localhost) → BackendGateway Pattern: Collector runs as a centralized service
App 1 ↘
App 2 → Collector (gateway) → Backend
App 3 ↗
Hybrid Pattern: Agent collectors forward to gateway collectors
App → Collector (agent) → Collector (gateway) → BackendImportant
For production, the gateway pattern is recommended. It centralizes configuration, reduces application dependencies, and enables advanced processing like tail-based sampling.
#Real-World Implementation: NestJS with Full Observability
Now let's build a production-grade NestJS application with complete OpenTelemetry instrumentation covering metrics, logs, and traces.
#Project Setup
First, create a new NestJS project and install dependencies:
npm i -g @nestjs/cli
nest new otel-demo
cd otel-demo#OpenTelemetry Configuration
Create a dedicated file for OpenTelemetry setup. This must be imported before any other application code:
import { NodeSDK } from '@opentelemetry/sdk-node';
import { getNodeAutoInstrumentations } from '@opentelemetry/auto-instrumentations-node';
import { OTLPTraceExporter } from '@opentelemetry/exporter-trace-otlp-proto';
import { OTLPMetricExporter } from '@opentelemetry/exporter-metrics-otlp-proto';
import { OTLPLogExporter } from '@opentelemetry/exporter-logs-otlp-proto';
import { PeriodicExportingMetricReader } from '@opentelemetry/sdk-metrics';
import { Resource } from '@opentelemetry/resources';
import {
  SEMRESATTRS_SERVICE_NAME,
  SEMRESATTRS_SERVICE_VERSION,
  SEMRESATTRS_DEPLOYMENT_ENVIRONMENT,
} from '@opentelemetry/semantic-conventions';

const resource = new Resource({
  [SEMRESATTRS_SERVICE_NAME]: 'nestjs-otel-demo',
  [SEMRESATTRS_SERVICE_VERSION]: '1.0.0',
  [SEMRESATTRS_DEPLOYMENT_ENVIRONMENT]: process.env.NODE_ENV || 'development',
});

const traceExporter = new OTLPTraceExporter({
  url: process.env.OTEL_EXPORTER_OTLP_TRACES_ENDPOINT || 'http://localhost:4318/v1/traces',
});

const metricExporter = new OTLPMetricExporter({
  url: process.env.OTEL_EXPORTER_OTLP_METRICS_ENDPOINT || 'http://localhost:4318/v1/metrics',
});

const logExporter = new OTLPLogExporter({
  url: process.env.OTEL_EXPORTER_OTLP_LOGS_ENDPOINT || 'http://localhost:4318/v1/logs',
});

const sdk = new NodeSDK({
  resource,
  traceExporter,
  metricReader: new PeriodicExportingMetricReader({
    exporter: metricExporter,
    exportIntervalMillis: 60000, // Export every 60 seconds
  }),
  logRecordProcessor: new BatchLogRecordProcessor(logExporter),
  instrumentations: [
    getNodeAutoInstrumentations({
      '@opentelemetry/instrumentation-fs': {
        enabled: false, // Disable filesystem instrumentation (too noisy)
      },
      '@opentelemetry/instrumentation-http': {
        ignoreIncomingRequestHook: (req) => {
          // Ignore health check endpoints
          return req.url?.includes('/health') || false;
        },
      },
    }),
  ],
});

sdk.start();

// Graceful shutdown
process.on('SIGTERM', () => {
  sdk.shutdown()
    .then(() => console.log('OpenTelemetry SDK shut down successfully'))
    .catch((error) => console.error('Error shutting down OpenTelemetry SDK', error))
    .finally(() => process.exit(0));
});

export default sdk;#Update Main Entry Point
Import tracing before anything else:
// MUST be first import
import './tracing';

import { NestFactory } from '@nestjs/core';
import { AppModule } from './app.module';

async function bootstrap() {
  const app = await NestFactory.create(AppModule);
  await app.listen(3000);
  console.log('Application is running on: http://localhost:3000');
}

bootstrap();
Warning
The tracing import must be the first line in your entry point. If you import other modules first, they won't be instrumented automatically.
#Custom Metrics Service
Create a service for custom business metrics:
import { Injectable } from '@nestjs/common';
import { metrics } from '@opentelemetry/api';

@Injectable()
export class MetricsService {
  private readonly meter = metrics.getMeter('nestjs-otel-demo');

  // Counter: Monotonically increasing value
  private readonly requestCounter = this.meter.createCounter('http.requests.total', {
    description: 'Total number of HTTP requests',
  });

  private readonly orderCounter = this.meter.createCounter('orders.created.total', {
    description: 'Total number of orders created',
  });

  // Histogram: Distribution of values
  private readonly orderValueHistogram = this.meter.createHistogram('orders.value', {
    description: 'Distribution of order values',
    unit: 'USD',
  });

  // UpDownCounter: Can increase or decrease
  private readonly activeConnectionsCounter = this.meter.createUpDownCounter('connections.active', {
    description: 'Number of active connections',
  });

  // Observable Gauge: Async callback for current value
  private readonly memoryGauge = this.meter.createObservableGauge('process.memory.usage', {
    description: 'Process memory usage',
    unit: 'bytes',
  });

  constructor() {
    // Register callback for observable gauge
    this.memoryGauge.addCallback((observableResult) => {
      const memUsage = process.memoryUsage();
      observableResult.observe(memUsage.heapUsed, { type: 'heap' });
      observableResult.observe(memUsage.rss, { type: 'rss' });
    });
  }

  incrementRequestCount(method: string, route: string, statusCode: number) {
    this.requestCounter.add(1, {
      'http.method': method,
      'http.route': route,
      'http.status_code': statusCode,
    });
  }

  recordOrderCreated(value: number, currency: string, userId: string) {
    this.orderCounter.add(1, { currency, user_id: userId });
    this.orderValueHistogram.record(value, { currency });
  }

  incrementActiveConnections() {
    this.activeConnectionsCounter.add(1);
  }

  decrementActiveConnections() {
    this.activeConnectionsCounter.add(-1);
  }
}#Custom Logging Service
Create a structured logging service that integrates with OpenTelemetry:
import { Injectable, LoggerService as NestLoggerService } from '@nestjs/common';
import { trace, context, SpanStatusCode } from '@opentelemetry/api';
import { logs, SeverityNumber } from '@opentelemetry/api-logs';

@Injectable()
export class LoggerService implements NestLoggerService {
  private readonly logger = logs.getLogger('nestjs-otel-demo', '1.0.0');

  private emit(severity: SeverityNumber, message: string, attributes?: Record<string, any>) {
    const span = trace.getActiveSpan();
    const spanContext = span?.spanContext();

    this.logger.emit({
      severityNumber: severity,
      severityText: SeverityNumber[severity],
      body: message,
      attributes: {
        ...attributes,
        'trace_id': spanContext?.traceId,
        'span_id': spanContext?.spanId,
      },
      context: context.active(),
    });
  }

  log(message: string, attributes?: Record<string, any>) {
    this.emit(SeverityNumber.INFO, message, attributes);
  }

  error(message: string, trace?: string, attributes?: Record<string, any>) {
    const span = trace.getActiveSpan();
    if (span) {
      span.recordException(new Error(message));
      span.setStatus({ code: SpanStatusCode.ERROR, message });
    }

    this.emit(SeverityNumber.ERROR, message, {
      ...attributes,
      stack: trace,
    });
  }

  warn(message: string, attributes?: Record<string, any>) {
    this.emit(SeverityNumber.WARN, message, attributes);
  }

  debug(message: string, attributes?: Record<string, any>) {
    this.emit(SeverityNumber.DEBUG, message, attributes);
  }

  verbose(message: string, attributes?: Record<string, any>) {
    this.emit(SeverityNumber.TRACE, message, attributes);
  }
}#Tracing Service for Manual Instrumentation
Create a service to simplify manual span creation:
import { Injectable } from '@nestjs/common';
import { trace, context, Span, SpanStatusCode } from '@opentelemetry/api';

@Injectable()
export class TracingService {
  private readonly tracer = trace.getTracer('nestjs-otel-demo', '1.0.0');

  /**
   * Create a new span and execute a function within its context
   */
  async withSpan<T>(
    name: string,
    fn: (span: Span) => Promise<T>,
    attributes?: Record<string, any>,
  ): Promise<T> {
    return this.tracer.startActiveSpan(name, async (span) => {
      try {
        if (attributes) {
          span.setAttributes(attributes);
        }

        const result = await fn(span);
        span.setStatus({ code: SpanStatusCode.OK });
        return result;
      } catch (error) {
        span.recordException(error);
        span.setStatus({
          code: SpanStatusCode.ERROR,
          message: error.message,
        });
        throw error;
      } finally {
        span.end();
      }
    });
  }

  /**
   * Get the current active span
   */
  getActiveSpan(): Span | undefined {
    return trace.getActiveSpan();
  }

  /**
   * Add attributes to the current span
   */
  addAttributes(attributes: Record<string, any>) {
    const span = this.getActiveSpan();
    if (span) {
      span.setAttributes(attributes);
    }
  }

  /**
   * Add an event to the current span
   */
  addEvent(name: string, attributes?: Record<string, any>) {
    const span = this.getActiveSpan();
    if (span) {
      span.addEvent(name, attributes);
    }
  }
}#Telemetry Module
Create a module to provide telemetry services:
import { Global, Module } from '@nestjs/common';
import { MetricsService } from './metrics.service';
import { LoggerService } from './logger.service';
import { TracingService } from './tracing.service';

@Global()
@Module({
  providers: [MetricsService, LoggerService, TracingService],
  exports: [MetricsService, LoggerService, TracingService],
})
export class TelemetryModule {}#Business Logic: Orders Service
Now let's create a realistic service that uses all three pillars:
import { Injectable } from '@nestjs/common';
import { MetricsService } from '../telemetry/metrics.service';
import { LoggerService } from '../telemetry/logger.service';
import { TracingService } from '../telemetry/tracing.service';

interface Order {
  id: string;
  userId: string;
  items: Array<{ productId: string; quantity: number; price: number }>;
  total: number;
  status: 'pending' | 'processing' | 'completed' | 'failed';
  createdAt: Date;
}

@Injectable()
export class OrdersService {
  private orders: Map<string, Order> = new Map();

  constructor(
    private readonly metrics: MetricsService,
    private readonly logger: LoggerService,
    private readonly tracing: TracingService,
  ) {}

  async createOrder(userId: string, items: Array<{ productId: string; quantity: number; price: number }>) {
    return this.tracing.withSpan(
      'orders.create',
      async (span) => {
        span.setAttribute('user.id', userId);
        span.setAttribute('items.count', items.length);

        this.logger.log('Creating new order', {
          user_id: userId,
          items_count: items.length,
        });

        // Simulate validation
        await this.validateItems(items);

        // Calculate total
        const total = items.reduce((sum, item) => sum + item.price * item.quantity, 0);
        span.setAttribute('order.total', total);

        // Simulate payment processing
        await this.processPayment(userId, total);

        // Create order
        const order: Order = {
          id: `order-${Date.now()}`,
          userId,
          items,
          total,
          status: 'completed',
          createdAt: new Date(),
        };

        this.orders.set(order.id, order);

        // Record metrics
        this.metrics.recordOrderCreated(total, 'USD', userId);

        this.logger.log('Order created successfully', {
          order_id: order.id,
          user_id: userId,
          total,
        });

        span.addEvent('order.created', {
          order_id: order.id,
          total,
        });

        return order;
      },
      { 'operation.type': 'create' },
    );
  }

  private async validateItems(items: Array<{ productId: string; quantity: number; price: number }>) {
    return this.tracing.withSpan('orders.validateItems', async (span) => {
      span.setAttribute('items.count', items.length);

      // Simulate database lookup
      await this.simulateDelay(50);

      for (const item of items) {
        if (item.quantity <= 0) {
          this.logger.error('Invalid item quantity', undefined, {
            product_id: item.productId,
            quantity: item.quantity,
          });
          throw new Error(`Invalid quantity for product ${item.productId}`);
        }

        if (item.price <= 0) {
          this.logger.error('Invalid item price', undefined, {
            product_id: item.productId,
            price: item.price,
          });
          throw new Error(`Invalid price for product ${item.productId}`);
        }
      }

      span.addEvent('items.validated');
    });
  }

  private async processPayment(userId: string, amount: number) {
    return this.tracing.withSpan('orders.processPayment', async (span) => {
      span.setAttribute('payment.amount', amount);
      span.setAttribute('payment.currency', 'USD');
      span.setAttribute('user.id', userId);

      this.logger.log('Processing payment', {
        user_id: userId,
        amount,
      });

      // Simulate payment gateway call
      await this.simulateDelay(200);

      // Simulate occasional payment failures (10% chance)
      if (Math.random() < 0.1) {
        this.logger.error('Payment failed', undefined, {
          user_id: userId,
          amount,
          reason: 'insufficient_funds',
        });
        throw new Error('Payment failed: insufficient funds');
      }

      span.addEvent('payment.processed', {
        transaction_id: `txn-${Date.now()}`,
      });

      this.logger.log('Payment processed successfully', {
        user_id: userId,
        amount,
      });
    });
  }

  async getOrder(orderId: string) {
    return this.tracing.withSpan('orders.get', async (span) => {
      span.setAttribute('order.id', orderId);

      // Simulate database query
      await this.simulateDelay(30);

      const order = this.orders.get(orderId);

      if (!order) {
        this.logger.warn('Order not found', {
          order_id: orderId,
        });
        throw new Error('Order not found');
      }

      return order;
    });
  }

  async listOrders(userId: string) {
    return this.tracing.withSpan('orders.list', async (span) => {
      span.setAttribute('user.id', userId);

      // Simulate database query
      await this.simulateDelay(100);

      const userOrders = Array.from(this.orders.values())
        .filter(order => order.userId === userId);

      span.setAttribute('orders.count', userOrders.length);

      this.logger.log('Listed user orders', {
        user_id: userId,
        count: userOrders.length,
      });

      return userOrders;
    });
  }

  private simulateDelay(ms: number): Promise<void> {
    return new Promise(resolve => setTimeout(resolve, ms));
  }
}#Orders Controller
Create a controller with HTTP endpoints:
import { Controller, Get, Post, Body, Param, HttpCode, HttpStatus } from '@nestjs/common';
import { OrdersService } from './orders.service';
import { MetricsService } from '../telemetry/metrics.service';
import { TracingService } from '../telemetry/tracing.service';

@Controller('orders')
export class OrdersController {
  constructor(
    private readonly ordersService: OrdersService,
    private readonly metrics: MetricsService,
    private readonly tracing: TracingService,
  ) {}

  @Post()
  @HttpCode(HttpStatus.CREATED)
  async createOrder(
    @Body() createOrderDto: {
      userId: string;
      items: Array<{ productId: string; quantity: number; price: number }>;
    },
  ) {
    // Add custom attributes to the auto-instrumented HTTP span
    this.tracing.addAttributes({
      'user.id': createOrderDto.userId,
      'order.items_count': createOrderDto.items.length,
    });

    const order = await this.ordersService.createOrder(
      createOrderDto.userId,
      createOrderDto.items,
    );

    return {
      success: true,
      data: order,
    };
  }

  @Get(':id')
  async getOrder(@Param('id') id: string) {
    this.tracing.addAttributes({
      'order.id': id,
    });

    const order = await this.ordersService.getOrder(id);

    return {
      success: true,
      data: order,
    };
  }

  @Get('user/:userId')
  async listUserOrders(@Param('userId') userId: string) {
    this.tracing.addAttributes({
      'user.id': userId,
    });

    const orders = await this.ordersService.listOrders(userId);

    return {
      success: true,
      data: orders,
      count: orders.length,
    };
  }
}#HTTP Interceptor for Metrics
Create an interceptor to automatically record HTTP metrics:
import {
  Injectable,
  NestInterceptor,
  ExecutionContext,
  CallHandler,
} from '@nestjs/common';
import { Observable } from 'rxjs';
import { tap } from 'rxjs/operators';
import { MetricsService } from '../../telemetry/metrics.service';

@Injectable()
export class MetricsInterceptor implements NestInterceptor {
  constructor(private readonly metrics: MetricsService) {}

  intercept(context: ExecutionContext, next: CallHandler): Observable<any> {
    const request = context.switchToHttp().getRequest();
    const response = context.switchToHttp().getResponse();

    return next.handle().pipe(
      tap(() => {
        this.metrics.incrementRequestCount(
          request.method,
          request.route?.path || request.url,
          response.statusCode,
        );
      }),
    );
  }
}#Application Module
Wire everything together:
import { Module } from '@nestjs/common';
import { APP_INTERCEPTOR } from '@nestjs/core';
import { TelemetryModule } from './telemetry/telemetry.module';
import { OrdersModule } from './orders/orders.module';
import { MetricsInterceptor } from './common/interceptors/metrics.interceptor';

@Module({
  imports: [TelemetryModule, OrdersModule],
  providers: [
    {
      provide: APP_INTERCEPTOR,
      useClass: MetricsInterceptor,
    },
  ],
})
export class AppModule {}import { Module } from '@nestjs/common';
import { OrdersController } from './orders.controller';
import { OrdersService } from './orders.service';
@Module({
controllers: [OrdersController],
providers: [OrdersService],
})
export class OrdersModule {}#Setting Up the OpenTelemetry Collector
Create a collector configuration:
receivers:
  otlp:
    protocols:
      http:
        endpoint: 0.0.0.0:4318
      grpc:
        endpoint: 0.0.0.0:4317

processors:
  batch:
    timeout: 10s
    send_batch_size: 1024

  attributes:
    actions:
      - key: environment
        value: production
        action: insert

  filter:
    metrics:
      exclude:
        match_type: regexp
        metric_names:
          - .*test.*

exporters:
  logging:
    loglevel: debug

  otlp:
    endpoint: your-backend:4317
    tls:
      insecure: false

  prometheus:
    endpoint: 0.0.0.0:8889

service:
  pipelines:
    traces:
      receivers: [otlp]
      processors: [batch, attributes]
      exporters: [logging, otlp]

    metrics:
      receivers: [otlp]
      processors: [batch, filter]
      exporters: [logging, prometheus]

    logs:
      receivers: [otlp]
      processors: [batch, attributes]
exporters: [logging, otlp]#Docker Compose for Local Development
Create a complete local observability stack:
version: '3.8'

services:
  # OpenTelemetry Collector
  otel-collector:
    image: otel/opentelemetry-collector-contrib:latest
    command: ["--config=/etc/otel-collector-config.yaml"]
    volumes:
      - ./otel-collector-config.yaml:/etc/otel-collector-config.yaml
    ports:
      - "4317:4317"   # OTLP gRPC
      - "4318:4318"   # OTLP HTTP
      - "8889:8889"   # Prometheus metrics
    networks:
      - otel

  # Jaeger for traces
  jaeger:
    image: jaegertracing/all-in-one:latest
    environment:
      - COLLECTOR_OTLP_ENABLED=true
    ports:
      - "16686:16686" # Jaeger UI
      - "14250:14250" # gRPC
    networks:
      - otel

  # Prometheus for metrics
  prometheus:
    image: prom/prometheus:latest
    volumes:
      - ./prometheus.yml:/etc/prometheus/prometheus.yml
    ports:
      - "9090:9090"
    networks:
      - otel

  # Grafana for visualization
  grafana:
    image: grafana/grafana:latest
    environment:
      - GF_AUTH_ANONYMOUS_ENABLED=true
      - GF_AUTH_ANONYMOUS_ORG_ROLE=Admin
    ports:
      - "3001:3000"
    volumes:
      - grafana-storage:/var/lib/grafana
    networks:
      - otel

networks:
  otel:
    driver: bridge

volumes:
grafana-storage:global:
scrape_interval: 15s
evaluation_interval: 15s
scrape_configs:
- job_name: 'otel-collector'
static_configs:
- targets: ['otel-collector:8889']#Running the Application
Start the observability stack:
docker-compose up -dStart the NestJS application:
npm run start:dev#Testing the Implementation
Create some test requests:
curl -X POST http://localhost:3000/orders \
  -H "Content-Type: application/json" \
  -d '{
    "userId": "user-123",
    "items": [
      {
        "productId": "prod-1",
        "quantity": 2,
        "price": 29.99
      },
      {
        "productId": "prod-2",
        "quantity": 1,
        "price": 49.99
      }
    ]
}'curl http://localhost:3000/orders/order-1234567890curl http://localhost:3000/orders/user/user-123#Viewing Telemetry Data
Access the observability tools:
- Jaeger UI: http://localhost:16686 - View distributed traces
- Prometheus: http://localhost:9090 - Query metrics
- Grafana: http://localhost:3001 - Create dashboards
In Jaeger, you'll see traces showing the complete request flow:
HTTP POST /orders (250ms)
  ├─ orders.create (240ms)
  │   ├─ orders.validateItems (50ms)
  │   └─ orders.processPayment (200ms)
  └─ HTTP response
In Prometheus, query metrics:
# Request rate by endpoint
rate(http_requests_total[5m])

# Order creation rate
rate(orders_created_total[5m])

# 95th percentile order value
histogram_quantile(0.95, orders_value_bucket)#Common Mistakes and Pitfalls
#1. Not Importing Tracing First
// ❌ Wrong - other imports come first
import { NestFactory } from '@nestjs/core';
import './tracing';

// ✅ Correct - tracing is first
import './tracing';
import { NestFactory } from '@nestjs/core';
If tracing isn't imported first, automatic instrumentation won't work because modules are already loaded.
#2. Creating Too Many Spans
// ❌ Wrong - span for trivial operation
async calculateTotal(items) {
  return this.tracing.withSpan('calculateTotal', async () => {
    return items.reduce((sum, item) => sum + item.price, 0);
  });
}

// ✅ Correct - span for meaningful operation
async processPayment(amount) {
  return this.tracing.withSpan('processPayment', async () => {
    // External API call, worth tracing
    return this.paymentGateway.charge(amount);
  });
}
Spans have overhead. Only create spans for operations that cross boundaries (network, disk, external services) or are business-critical.
#3. Not Using Semantic Conventions
// ❌ Wrong - custom attribute names
span.setAttribute('method', 'GET');
span.setAttribute('url', '/api/users');

// ✅ Correct - semantic conventions
span.setAttribute('http.method', 'GET');
span.setAttribute('http.url', '/api/users');
Semantic conventions ensure your telemetry is portable and works with standard dashboards and queries.
#4. Forgetting to End Spans
// ❌ Wrong - span never ends
const span = tracer.startSpan('operation');
await doWork();
// Forgot to call span.end()

// ✅ Correct - use withSpan helper
await this.tracing.withSpan('operation', async (span) => {
  await doWork();
  // Automatically ended
});
Unended spans leak memory and corrupt traces. Always use helpers that guarantee span lifecycle management.
#5. Logging Sensitive Data
// ❌ Wrong - logging sensitive data
this.logger.log('User login', {
  email: user.email,
  password: user.password, // Never log passwords!
  credit_card: user.creditCard,
});

// ✅ Correct - sanitize sensitive data
this.logger.log('User login', {
  user_id: user.id,
  email_domain: user.email.split('@')[1],
});
Telemetry data is often stored for long periods and may be accessible to many people. Never log passwords, tokens, credit cards, or PII.
#6. Not Sampling in Production
// ❌ Wrong - sampling everything in production
const sdk = new NodeSDK({
  // No sampler configured = sample everything
});

// ✅ Correct - use appropriate sampling
const sdk = new NodeSDK({
  sampler: new TraceIdRatioBasedSampler(0.1), // Sample 10%
});
Sampling everything in high-traffic production systems is expensive and unnecessary. Use ratio-based or tail-based sampling.
#7. Blocking on Telemetry Export
// ❌ Wrong - synchronous export blocks requests
const sdk = new NodeSDK({
  spanProcessor: new SimpleSpanProcessor(exporter), // Synchronous
});

// ✅ Correct - batch export is async
const sdk = new NodeSDK({
  spanProcessor: new BatchSpanProcessor(exporter), // Async batching
});
Synchronous span processors block your application. Always use batch processors in production.
#Best Practices
#1. Use Resource Attributes Consistently
Define resource attributes once at startup:
const resource = new Resource({
  [SEMRESATTRS_SERVICE_NAME]: 'order-service',
  [SEMRESATTRS_SERVICE_VERSION]: process.env.APP_VERSION,
  [SEMRESATTRS_DEPLOYMENT_ENVIRONMENT]: process.env.NODE_ENV,
  [SEMRESATTRS_SERVICE_NAMESPACE]: 'ecommerce',
  'team.name': 'checkout',
  'region': process.env.AWS_REGION,
});
This metadata is attached to all telemetry, enabling filtering and grouping across services.
#2. Implement Health Checks
Exclude health check endpoints from tracing to reduce noise:
getNodeAutoInstrumentations({
  '@opentelemetry/instrumentation-http': {
    ignoreIncomingRequestHook: (req) => {
      return req.url?.includes('/health') ||
             req.url?.includes('/metrics') ||
             req.url?.includes('/ready');
    },
  },
});#3. Correlate Logs with Traces
Always include trace context in logs:
const span = trace.getActiveSpan();
const spanContext = span?.spanContext();

logger.log('Processing order', {
  order_id: orderId,
  trace_id: spanContext?.traceId,
  span_id: spanContext?.spanId,
});
This enables jumping from logs to traces and vice versa in your observability platform.
#4. Use Cardinality Wisely
// ❌ High cardinality - creates too many metric series
this.counter.add(1, {
  user_id: userId, // Millions of unique values
  order_id: orderId,
});

// ✅ Low cardinality - bounded dimensions
this.counter.add(1, {
  user_tier: 'premium', // Limited values: free, premium, enterprise
  region: 'us-east-1',
});
High-cardinality attributes in metrics create millions of time series, overwhelming your metrics backend. Use high-cardinality data in traces and logs instead.
#5. Implement Graceful Shutdown
Ensure telemetry is flushed before shutdown:
process.on('SIGTERM', async () => {
  console.log('SIGTERM received, shutting down gracefully');

  // Flush telemetry
  await sdk.shutdown();

  // Close server
  await app.close();

  process.exit(0);
});
Without graceful shutdown, you'll lose telemetry data from the last few seconds before termination.
#6. Monitor the Collector
The collector itself needs monitoring. Export collector metrics:
service:
  telemetry:
    metrics:
      address: 0.0.0.0:8888
Monitor:
otelcol_receiver_accepted_spans: Spans receivedotelcol_exporter_sent_spans: Spans exportedotelcol_processor_batch_batch_send_size: Batch sizesotelcol_exporter_send_failed_spans: Export failures
#7. Use Context Propagation Correctly
When making HTTP calls to other services, propagate context:
import { propagation, context } from '@opentelemetry/api';

async callExternalService(url: string) {
  const headers = {};

  // Inject trace context into headers
  propagation.inject(context.active(), headers);

  return axios.get(url, { headers });
}
This ensures traces span across service boundaries.
#When NOT to Use OpenTelemetry
OpenTelemetry isn't always the right choice. Consider alternatives when:
#1. Simple Applications
For a single-service application with low traffic, OpenTelemetry might be overkill. Simple logging and basic metrics may suffice.
Alternative: Use a simple logger like Winston or Pino with basic metrics from your framework.
#2. Extreme Performance Requirements
OpenTelemetry adds overhead. For ultra-low-latency systems (sub-millisecond), even minimal instrumentation may be unacceptable.
Alternative: Use sampling-based profilers or custom lightweight instrumentation.
#3. Legacy Systems Without Vendor Support
If you're locked into a proprietary observability platform that doesn't support OpenTelemetry, migration may not be worth it.
Alternative: Stick with vendor-specific agents until you can migrate.
#4. Serverless with Cold Start Sensitivity
OpenTelemetry SDK initialization adds to cold start time in serverless functions. For latency-critical functions, this matters.
Alternative: Use vendor-specific lightweight SDKs (AWS X-Ray SDK, Google Cloud Trace) or defer initialization.
#5. Cost-Constrained Environments
Telemetry data storage is expensive. If you're on a tight budget, full observability may not be feasible.
Alternative: Use aggressive sampling, focus on errors only, or use open-source backends (Jaeger, Prometheus, Grafana).
#Production Considerations
#Performance Impact
OpenTelemetry has measurable overhead:
- CPU: 1-5% increase depending on instrumentation depth
- Memory: 50-200MB for SDK and buffers
- Latency: 0.1-1ms per instrumented operation
- Network: Depends on sampling rate and batch size
Mitigation strategies:
- Use appropriate sampling (10-20% for high traffic)
- Batch exports (default: 512 spans per batch)
- Disable noisy instrumentations (filesystem, DNS)
- Use the collector to offload processing
#Security Considerations
Telemetry data can contain sensitive information:
- Sanitize attributes: Remove PII, tokens, passwords
- Use TLS: Encrypt data in transit to collector/backend
- Restrict access: Limit who can view telemetry data
- Retention policies: Delete old data to comply with regulations
- Audit logs: Track who accesses telemetry data
Example sanitization:
span.setAttribute('http.url', sanitizeUrl(url)); // Remove query params
span.setAttribute('user.id', hashUserId(userId)); // Hash instead of plaintext#Cost Management
Telemetry data is expensive at scale:
- Traces: $0.10-$2.00 per million spans
- Metrics: $0.05-$0.30 per metric per month
- Logs: $0.50-$2.00 per GB
Cost optimization:
- Sample aggressively (1-10% for most traffic)
- Use tail-based sampling to keep interesting traces
- Set retention policies (7-30 days for most data)
- Use tiered storage (hot/warm/cold)
- Filter out noisy data in the collector
#High Availability
Make your observability stack resilient:
- Collector redundancy: Run multiple collector instances
- Queue buffering: Configure retry and queue limits
- Fallback exporters: Export to multiple backends
- Circuit breakers: Prevent cascading failures
Example collector HA configuration:
exporters:
  otlp/primary:
    endpoint: primary-backend:4317
    retry_on_failure:
      enabled: true
      max_elapsed_time: 300s

  otlp/fallback:
    endpoint: fallback-backend:4317

service:
  pipelines:
    traces:
exporters: [otlp/primary, otlp/fallback]#Compliance and Privacy
Ensure telemetry collection complies with regulations:
- GDPR: Implement data deletion, anonymization
- HIPAA: Encrypt data, restrict access, audit logs
- SOC 2: Document data handling, access controls
- PCI DSS: Never log credit card data
Use the collector to enforce policies:
processors:
  attributes:
    actions:
      # Remove sensitive attributes
      - key: credit_card
        action: delete
      - key: ssn
        action: delete

      # Hash user IDs
      - key: user.id
action: hash#Conclusion
OpenTelemetry represents a fundamental shift in how we approach observability. By providing a vendor-neutral standard, it eliminates lock-in and enables true portability of telemetry data. The three pillars—metrics, logs, and traces—work together to provide complete visibility into distributed systems.
The NestJS implementation we built demonstrates how to leverage all three pillars in a real-world application. Automatic instrumentation provides baseline coverage, while manual instrumentation adds business context and custom metrics. The OpenTelemetry Collector acts as a centralized pipeline for processing and routing telemetry data.
Key takeaways:
- OpenTelemetry is the industry standard for cloud-native observability
- Use automatic instrumentation for quick wins, manual for business context
- The collector centralizes configuration and enables advanced processing
- Follow semantic conventions for portable, consistent telemetry
- Balance observability needs with performance and cost constraints
- Implement proper sampling, security, and compliance measures
Start with automatic instrumentation to get immediate value, then gradually add manual instrumentation for critical paths. Use the collector in production for flexibility and resilience. Most importantly, treat observability as a first-class concern—instrument early, instrument often, and make data-driven decisions.
The future of observability is open, standardized, and vendor-neutral. OpenTelemetry is that future.