OSI Model Fundamentals - Complete Guide to Network Layers
Master the OSI model from theory to implementation. Learn each layer, IP addressing, subnetting, DNS, TCP/UDP, and ports—essential knowledge for network engineers, software developers, cloud engineers, and DevOps professionals.

#Introduction
The OSI (Open Systems Interconnection) model is the foundation of modern networking. Whether you're building microservices, managing cloud infrastructure, debugging network issues, or designing distributed systems, understanding the OSI model is non-negotiable.
Many engineers treat networking as a black box—they know "the internet works" but can't explain why. This creates blind spots when troubleshooting production issues, optimizing performance, or designing secure systems.
This guide takes you from theory to implementation. You'll understand not just what each layer does, but how it works in real systems. By the end, you'll have the mental model needed for any IT-related career: network engineering, software development, cloud architecture, or DevOps.
#Table of Contents
#The OSI Model Overview
#What is the OSI Model?
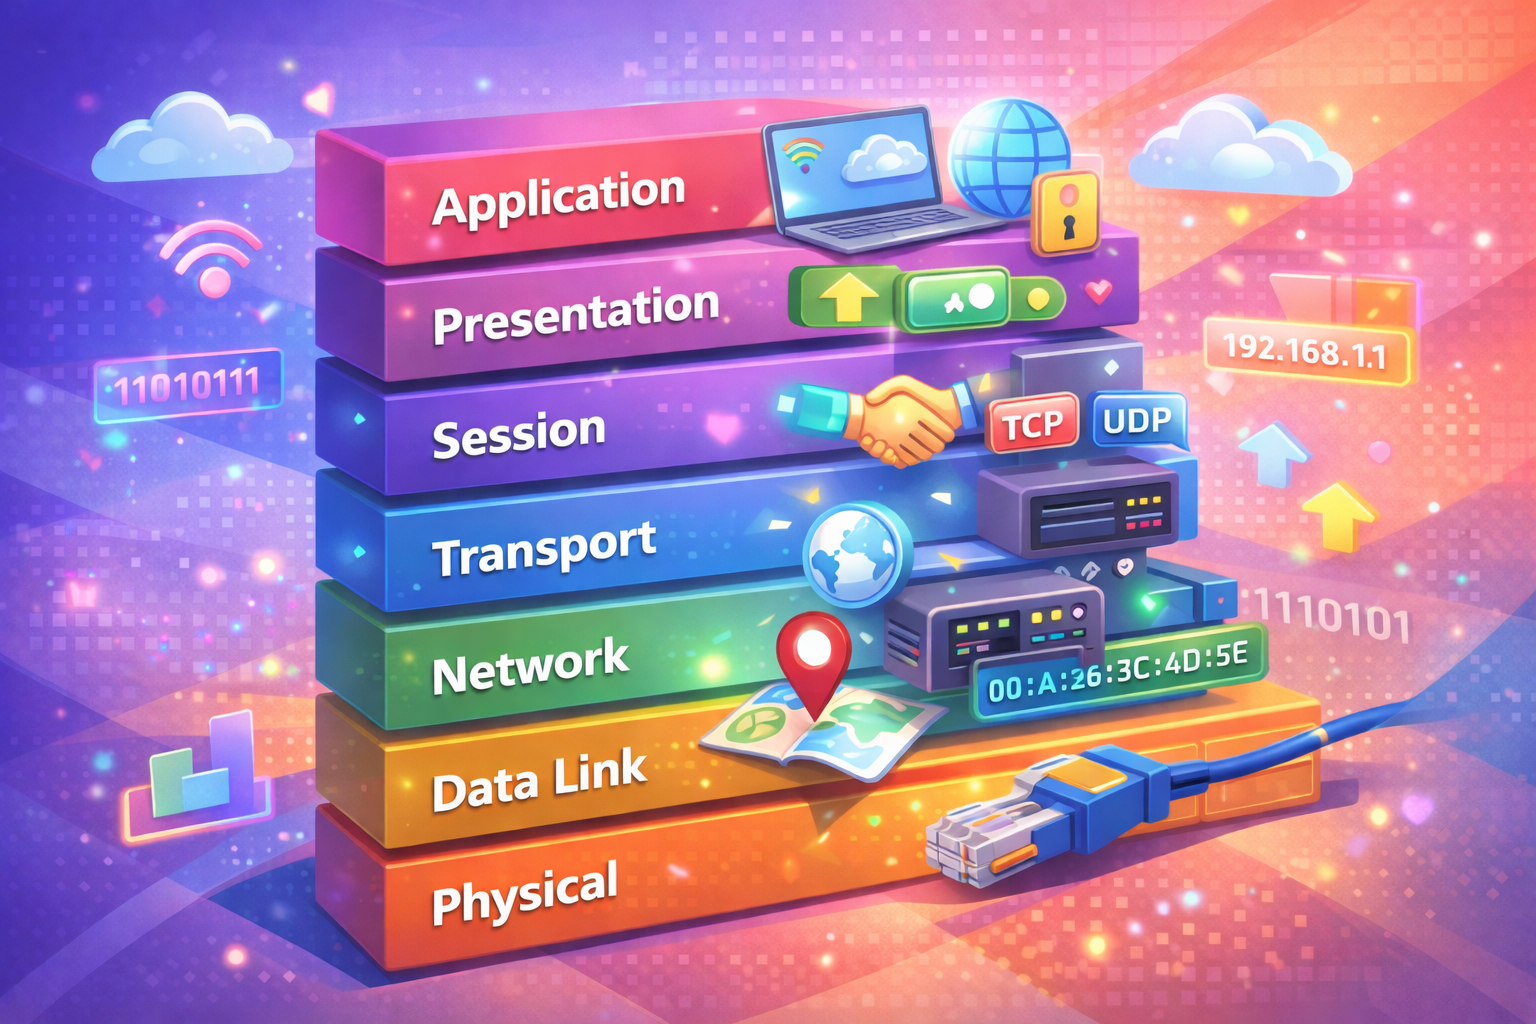
The OSI model is a conceptual framework that standardizes how computer systems communicate. It divides networking into 7 layers, each with specific responsibilities. Think of it like a postal system:
- Layer 7 (Application) = Your letter's content
- Layer 6 (Presentation) = Formatting the letter
- Layer 5 (Session) = Establishing the conversation
- Layer 4 (Transport) = Choosing between mail or courier
- Layer 3 (Network) = Routing to the right city
- Layer 2 (Data Link) = Routing to the right building
- Layer 1 (Physical) = The actual delivery truck
Each layer adds its own "envelope" (header) to the data, a process called encapsulation.
#Why Learn the OSI Model?
- Troubleshooting: Know which layer to investigate when things break
- Performance: Understand bottlenecks and optimization points
- Security: Implement controls at the right layer
- Design: Make informed architectural decisions
- Career: Required knowledge for network, cloud, and DevOps roles
#Layer 1: Physical Layer
#Theory
The Physical Layer is where data becomes electricity, light, or radio waves. It defines the hardware specifications: cables, connectors, voltage levels, and transmission rates.
#Real-World Examples
- Ethernet cables (Cat5e, Cat6, Cat6a)
- Fiber optic cables
- WiFi radio frequencies (2.4 GHz, 5 GHz, 6 GHz)
- Copper telephone lines
#Key Concepts
Bandwidth: The maximum data rate a medium can carry. Measured in bits per second (bps).
1 Kbps = 1,000 bits/second
1 Mbps = 1,000,000 bits/second
1 Gbps = 1,000,000,000 bits/secondLatency: The time it takes for data to travel from source to destination. Fiber optic cables have lower latency than copper.
#Practical Implementation
When you plug an Ethernet cable into your computer, you're working at Layer 1. The cable carries electrical signals that represent 1s and 0s.
ethtool eth0
# Output shows speed, duplex, and link status#Layer 2: Data Link Layer
#Theory
The Data Link Layer handles communication between devices on the same local network. It uses MAC (Media Access Control) addresses to identify devices.
#MAC Addresses
A MAC address is a 48-bit identifier unique to a network interface. Format: XX:XX:XX:XX:XX:XX where each pair is a hexadecimal value.
Example: 00:1A:2B:3C:4D:5EBreaking it down:
- First 3 pairs (OUI): Manufacturer identifier
- Last 3 pairs: Device-specific identifier
#Hexadecimal Basics
Hexadecimal uses 16 digits: 0-9 and A-F (where A=10, B=11, C=12, D=13, E=14, F=15).
Decimal → Hexadecimal
0 → 0x00
15 → 0x0F
255 → 0xFF
256 → 0x100
Why hexadecimal? It's compact. 8 bits (0-255) fit in 2 hex digits.
#Switches and ARP
Switches operate at Layer 2. They learn MAC addresses and forward frames to the correct physical port.
ARP (Address Resolution Protocol): Maps IP addresses to MAC addresses.
arp -a
# Output:
# ? (192.168.1.1) at 00:11:22:33:44:55 on en0 ifscope [ethernet]
# ? (192.168.1.100) at aa:bb:cc:dd:ee:ff on en0 ifscope [ethernet]#Practical Implementation
ip link show
# or
ifconfig#Layer 3: Network Layer
#Theory
The Network Layer handles routing and logical addressing using IP addresses. It determines the best path for data to travel across networks.
#IP Addresses and Binary
An IPv4 address is 32 bits, divided into 4 octets (8 bits each).
192.168.1.100

In binary:
11000000.10101000.00000001.01100100
Converting decimal to binary:
192 = 128 + 64 = 10000000 + 11000000 = 11000000
168 = 128 + 32 + 8 = 10101000
1 = 00000001
100 = 64 + 32 + 4 = 01100100#IP Address Classes (Legacy)
Class A: 1.0.0.0 - 126.255.255.255 (1-126 first octet)
Class B: 128.0.0.0 - 191.255.255.255 (128-191 first octet)
Class C: 192.0.0.0 - 223.255.255.255 (192-223 first octet)
Modern networks use CIDR (Classless Inter-Domain Routing) instead.
#Subnetting and Subnet Masks
A subnet mask determines which part of an IP address is the network and which part is the host.
IP: 192.168.1.100
Subnet Mask: 255.255.255.0

In binary:
IP:           11000000.10101000.00000001.01100100
Mask:         11111111.11111111.11111111.00000000
Network:      11000000.10101000.00000001.00000000 = 192.168.1.0
Host:                                   01100100 = 100
CIDR Notation: /24 means 24 bits for network, 8 bits for hosts.
192.168.1.0/24 = 192.168.1.0 - 192.168.1.255
192.168.1.0/25 = 192.168.1.0 - 192.168.1.127 (128 addresses)
192.168.1.128/25 = 192.168.1.128 - 192.168.1.255 (128 addresses)#Calculating Subnets
For a /24 network:
- Network address: 192.168.1.0
- Broadcast address: 192.168.1.255
- Usable hosts: 192.168.1.1 - 192.168.1.254 (254 addresses)
Formula: 2^(32 - prefix_length) = total addresses
2^(32 - 24) = 2^8 = 256 addresses#Default Gateway
The default gateway is the router's IP address on your local network. It's the exit point to reach other networks.
route -n
# or
ip route show#DNS (Domain Name System)
DNS translates domain names to IP addresses. It operates at Layer 7 (Application) but is crucial for Layer 3 routing.
www.example.com → 93.184.216.34DNS Resolution Process:
- Your computer queries a recursive resolver (usually your ISP's)
- Resolver queries root nameserver
- Root directs to TLD nameserver (.com, .org, etc.)
- TLD directs to authoritative nameserver
- Authoritative nameserver returns the IP address
nslookup www.example.com
# or
dig www.example.com#Practical Implementation
# Edit netplan configuration
sudo nano /etc/netplan/00-installer-config.yamlnetwork:
version: 2
ethernets:
eth0:
dhcp4: false
addresses:
- 192.168.1.100/24
gateway4: 192.168.1.1
nameservers:
addresses: [8.8.8.8, 8.8.4.4]sudo netplan apply#Layer 4: Transport Layer
#Theory
The Transport Layer manages end-to-end communication and data flow. It ensures data arrives reliably and in order (or not, depending on the protocol).
#TCP vs UDP
TCP (Transmission Control Protocol):
- Connection-oriented (handshake required)
- Reliable delivery
- In-order delivery
- Flow control
- Slower but guaranteed
UDP (User Datagram Protocol):
- Connectionless
- No guarantee of delivery
- No ordering guarantee
- Low overhead
- Faster but unreliable
#TCP Three-Way Handshake
Client                          Server
  |                               |
  |------------ SYN ------------->|
  |                               |
  |<------- SYN-ACK -------------|
  |                               |
  |------------ ACK ------------->|
  |                               |
|<---- Data Exchange ---------->|#Ports
Ports are logical endpoints for communication. Range: 0-65535.
Well-Known Ports (0-1023): Reserved for system services.
80   - HTTP
443  - HTTPS
22   - SSH
21   - FTP
25   - SMTP
53   - DNS
3306 - MySQL
5432 - PostgreSQL
6379 - Redis
Registered Ports (1024-49151): Assigned by IANA for specific services.
3000 - Node.js (common)
5000 - Flask (common)
8080 - HTTP Alternate
8443 - HTTPS Alternate
9200 - Elasticsearch
Dynamic/Private Ports (49152-65535): Ephemeral ports for client connections.
#Practical Implementation
netstat -tuln
# or
ss -tulnlsof -i :8080
# Shows process using port 8080nc -zv example.com 443
# -z: scan mode, -v: verbose#Layer 5: Session Layer
#Theory
The Session Layer manages conversations between applications. It establishes, maintains, and terminates sessions.
#Real-World Examples
- HTTP Sessions: Cookies and session IDs
- Database Connections: Connection pooling
- VPN Sessions: Encrypted tunnels
- RDP Sessions: Remote desktop connections
#Practical Implementation
who
# Shows logged-in users

w
# Shows active sessions with details#Layer 6: Presentation Layer
#Theory
The Presentation Layer handles data formatting, encryption, and compression. It ensures data is readable by the application layer.
#Real-World Examples
- Encryption: TLS/SSL for HTTPS
- Compression: GZIP for HTTP responses
- Encoding: UTF-8, ASCII
- Serialization: JSON, XML, Protocol Buffers
#Practical Implementation
openssl s_client -connect example.com:443gzip -k file.txt
# Creates file.txt.gz#Layer 7: Application Layer
#Theory
The Application Layer is where users and applications interact. It provides network services directly to user applications.
#Common Protocols
HTTP/HTTPS  - Web browsing
SMTP/POP3   - Email
SSH         - Secure shell
FTP         - File transfer
DNS         - Domain resolution
DHCP - IP assignment#Practical Implementation
curl -v https://example.com
# -v: verbose (shows headers)dig @8.8.8.8 example.com
# Query Google's DNS server#Data Encapsulation: Putting It All Together
As data moves down the OSI layers, each layer adds its own header. This is encapsulation.
Layer 7: [Application Data]
Layer 6: [Presentation Header][Application Data]
Layer 5: [Session Header][Presentation Header][Application Data]
Layer 4: [TCP/UDP Header][Session Header][Presentation Header][Application Data]
Layer 3: [IP Header][TCP/UDP Header][Session Header][Presentation Header][Application Data]
Layer 2: [Ethernet Header][IP Header][TCP/UDP Header][Session Header][Presentation Header][Application Data][Trailer]
Layer 1: [Electrical Signals]
Each layer's data unit has a name:
Layer 7-5: Data
Layer 4: Segment (TCP) or Datagram (UDP)
Layer 3: Packet
Layer 2: Frame
Layer 1: Bits#Common Mistakes and Pitfalls
#Mistake 1: Confusing MAC and IP Addresses
Wrong: "I'll use MAC addresses to route across the internet."
Why it fails: MAC addresses only work on local networks. Routers strip MAC headers and add new ones at each hop.
Correct approach: Use IP addresses for routing across networks, MAC addresses for local delivery.
#Mistake 2: Assuming TCP is Always Better
Wrong: "I'll use TCP for everything because it's reliable."
Why it fails: TCP overhead makes it unsuitable for real-time applications like video streaming or online gaming.
Correct approach: Use UDP for latency-sensitive applications, TCP for data integrity.
#Mistake 3: Ignoring Port Numbers
Wrong: "Ports don't matter, just use any available port."
Why it fails: Well-known ports have specific purposes. Using port 80 for a custom service breaks expectations and causes conflicts.
Correct approach: Use registered ports (1024-49151) for custom services.
#Mistake 4: Misconfiguring Subnets
Wrong: "I'll use 192.168.1.0/32 for my network."
Why it fails: /32 means only 1 address. You need /24 or /25 for multiple hosts.
Correct approach: Calculate subnet size based on host count.
#Mistake 5: Not Understanding DNS Propagation
Wrong: "I changed my DNS record, why isn't it working immediately?"
Why it fails: DNS has TTL (Time To Live). Changes take time to propagate.
Correct approach: Lower TTL before making changes, wait for propagation.
#Best Practices
#Network Design
-
Use private IP ranges for internal networks:
- 10.0.0.0/8
- 172.16.0.0/12
- 192.168.0.0/16
-
Plan subnets carefully: Leave room for growth.
-
Document everything: IP ranges, gateway addresses, DNS servers.
#Security
-
Implement firewalls at Layer 3 and 4.
-
Use TLS/SSL (Layer 6) for sensitive data.
-
Validate DNS responses to prevent DNS spoofing.
-
Monitor open ports regularly.
#Performance
-
Use UDP for real-time applications.
-
Implement connection pooling at Layer 5.
-
Enable compression at Layer 6.
-
Monitor latency at Layer 1 and 3.
#DevOps and Cloud
-
Understand security groups (Layer 3/4 firewalls in AWS).
-
Configure load balancers at Layer 4 or 7.
-
Use service discovery instead of hardcoding IPs.
-
Monitor network metrics: packet loss, latency, throughput.
#When NOT to Use This Approach
The OSI model is a framework, not a law. Some scenarios require different thinking:
#Microservices Architecture
In containerized environments, the OSI model still applies, but service mesh (Istio, Linkerd) abstracts networking complexity.
#Software-Defined Networking (SDN)
SDN decouples control plane from data plane, changing how you think about Layers 2-3.
#Overlay Networks
VPNs and tunneling protocols create virtual networks on top of physical ones, adding complexity.
#Practical Exercises
#Exercise 1: Subnet Calculation
Given: 192.168.10.0/24, need 5 subnets with 50 hosts each.
Solution:
- 50 hosts need 6 bits (2^6 = 64)
- So use /26 (32 - 6 = 26)
- Subnets: 192.168.10.0/26, 192.168.10.64/26, 192.168.10.128/26, etc.
#Exercise 2: Troubleshooting Connectivity
# 1. Check physical connection
ethtool eth0

# 2. Check IP configuration
ip addr show

# 3. Check routing
ip route show

# 4. Check DNS
nslookup example.com

# 5. Test connectivity
ping 8.8.8.8

# 6. Test specific port
nc -zv example.com 443#Exercise 3: Packet Analysis
sudo tcpdump -i eth0 -n 'tcp port 443'
# Captures HTTPS traffic on eth0#Conclusion
The OSI model is your mental framework for understanding networks. Master these concepts:
- Layer 1: Physical transmission
- Layer 2: Local delivery (MAC addresses)
- Layer 3: Routing (IP addresses, subnetting)
- Layer 4: End-to-end communication (TCP/UDP, ports)
- Layers 5-7: Session, presentation, application
This knowledge is foundational for:
- Network Engineers: Design and troubleshoot networks
- Software Engineers: Build networked applications
- Cloud Engineers: Configure cloud infrastructure
- DevOps: Manage containerized systems and service mesh
- SRE: Monitor and optimize system performance
Start with Layer 1 and work up. Understand binary and hexadecimal. Practice subnetting. Debug real network issues. The OSI model will become second nature, and you'll troubleshoot problems that stump others.
Your next step: Set up a lab environment (VirtualBox, Docker) and practice configuring networks from scratch. Real experience beats theory every time.