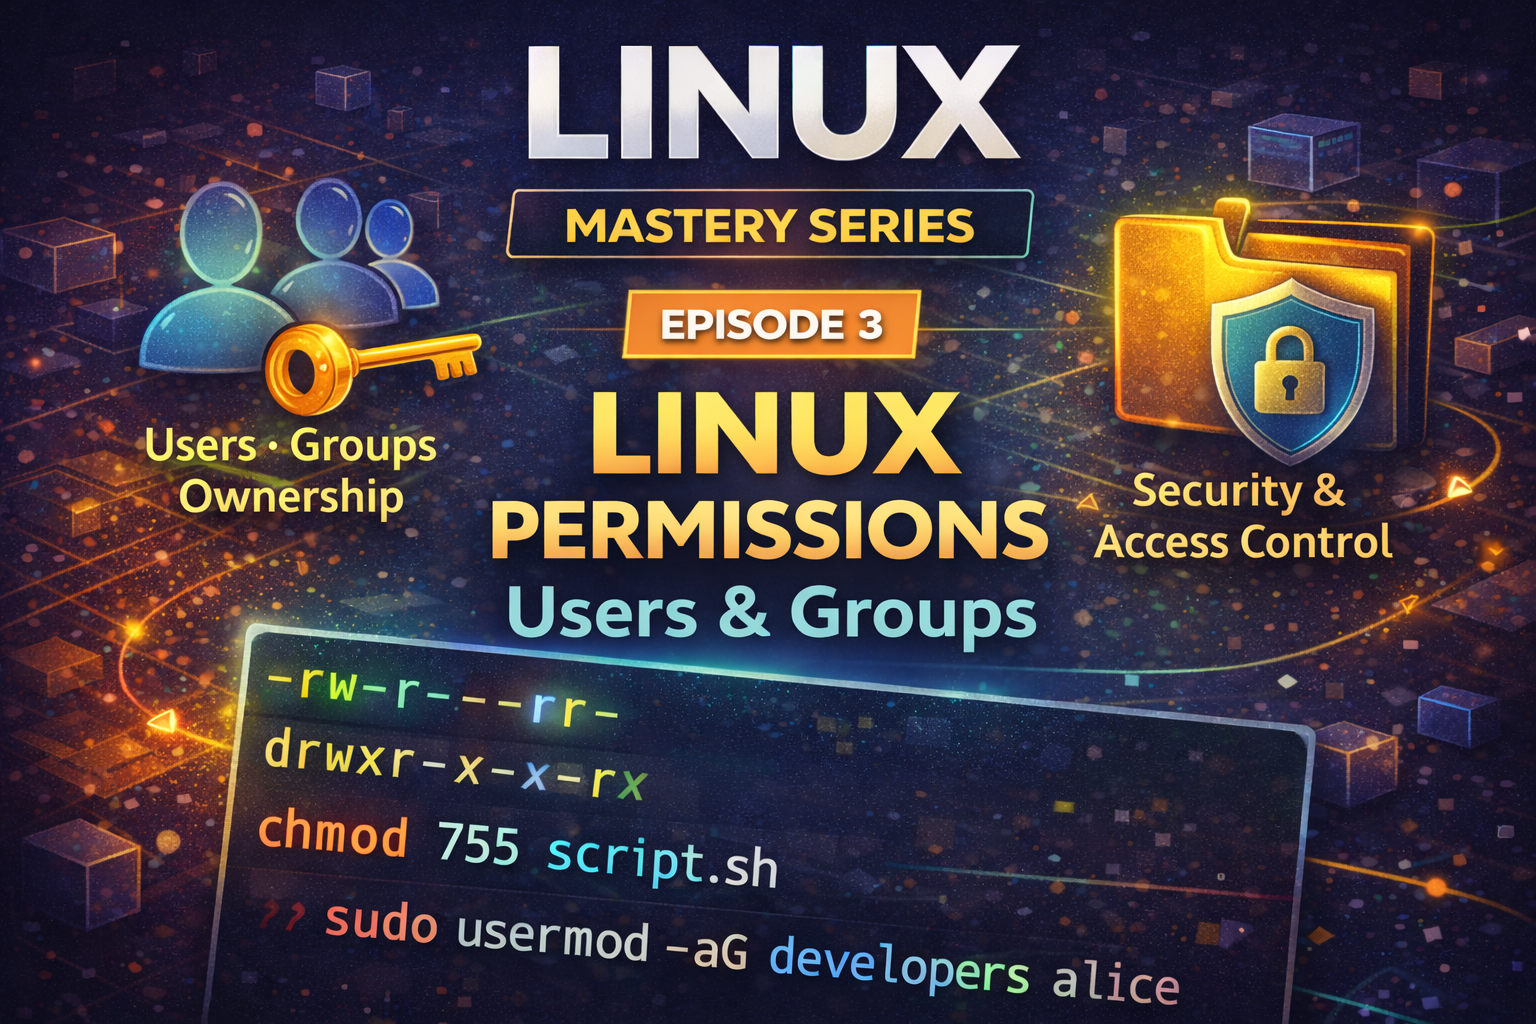
Linux Permissions, Users and Groups - Episode 3 of Linux Mastery Series
Master file permissions, user and group management, and security best practices. Essential knowledge for system administration and DevOps.

#Introduction
In Episode 1, we learned that Linux is multi-user and multi-tasking. In Episode 2, we explored how the kernel isolates processes using namespaces and cgroups.
Now we're diving into one of Linux's most critical features: permissions and access control. This is where security happens.
Linux permissions determine:
- Who can read, write, and execute files
- Who can access directories
- Who can run privileged commands
- How to safely share resources between users
Whether you're managing a production server, deploying applications, or just using Linux, understanding permissions is non-negotiable. Misconfigured permissions are one of the most common security vulnerabilities.
In this episode, we'll master:
- Users and groups
- File permissions (numeric and human-readable formats)
- Ownership and access control
- Advanced permissions (setuid, setgid, sticky bit)
- sudo and privilege escalation
- Security best practices
By the end, you'll understand how to secure your Linux systems and why permissions matter.
#Understanding Users and Groups
#What are Users?
A user is an identity on a Linux system. Each user has:
- Username: Human-readable name (e.g.,
alice,bob) - User ID (UID): Numeric identifier (e.g., 1000, 1001)
- Home directory: Where the user's files are stored (e.g.,
/home/alice) - Shell: Default command interpreter (e.g.,
/bin/bash) - Password: Authentication credential (stored securely in
/etc/shadow)
Users are the foundation of Linux security. Every process runs as a specific user, and permissions are enforced based on the user's identity.
#What are Groups?
A group is a collection of users. Groups allow you to:
- Manage permissions for multiple users at once
- Organize users by role or function
- Control access to shared resources
Each group has:
- Group name: Human-readable name (e.g.,
developers,admins) - Group ID (GID): Numeric identifier (e.g., 1000, 1001)
- Members: Users who belong to the group
A user can belong to multiple groups. The primary group is set when the user is created; additional groups are supplementary.
#The Root User
The root user (UID 0) is the superuser with unlimited privileges:
- Can read, write, and execute any file
- Can create and delete users
- Can modify system configuration
- Can install software
- Can access any device
Root is powerful but dangerous. Mistakes as root can destroy the system. This is why the principle of least privilege is important: use root only when necessary.
#System Users vs. Regular Users
Regular Users (UID >= 1000)
- Created for people to log in
- Have home directories
- Can own files and processes
- Limited privileges
System Users (UID < 1000)
- Created for system services (nginx, mysql, postgres)
- Often have no login shell
- Own system processes and files
- Limited to specific functions
You can see system users in /etc/passwd:
root:x:0:0:root:/root:/bin/bash
daemon:x:1:1:daemon:/usr/sbin:/usr/sbin/nologin
nginx:x:33:33:nginx:/var/www:/usr/sbin/nologin
mysql:x:105:111:MySQL Server:/var/lib/mysql:/bin/false
alice:x:1000:1000:Alice User:/home/alice:/bin/bash
Notice that system users have /usr/sbin/nologin or /bin/false as their shell—they can't log in interactively.
#User and Group Management
#Creating Users
# Create a new user
sudo useradd -m -s /bin/bash alice

# Create a user with specific UID
sudo useradd -m -u 1500 -s /bin/bash bob

# Create a system user (no home directory, no login)
sudo useradd -r -s /usr/sbin/nologin appuser

# Set password for user
sudo passwd alice

# Create user with home directory and shell in one command
sudo adduser alice # Interactive, more user-friendly#Creating Groups
# Create a new group
sudo groupadd developers

# Create a group with specific GID
sudo groupadd -g 2000 admins

# Create a system group
sudo groupadd -r appgroup#Adding Users to Groups
# Add user to a group
sudo usermod -aG developers alice

# Add user to multiple groups
sudo usermod -aG developers,admins alice

# View groups for a user
groups alice

# View all members of a group
getent group developersImportant
Use -aG (append to groups) not -G (replace groups). Using -G without -a removes the user from all other groups.
#Modifying User Properties
# Change user's home directory
sudo usermod -d /home/newhome alice

# Change user's shell
sudo usermod -s /bin/zsh alice

# Change user's UID
sudo usermod -u 2000 alice

# Lock a user account
sudo usermod -L alice

# Unlock a user account
sudo usermod -U alice#Deleting Users and Groups
# Delete a user (keep home directory)
sudo userdel alice

# Delete a user and home directory
sudo userdel -r alice

# Delete a group
sudo groupdel developers

# Remove user from a group
sudo deluser alice developers#Viewing User and Group Information
# View all users
cat /etc/passwd

# View all groups
cat /etc/group

# View user details
id alice

# View current user
whoami

# View all logged-in users
w

# View user's groups
groups alice#File Permissions Fundamentals
#Permission Basics
Every file and directory in Linux has three types of permissions:
- Read (r): Can view file contents or list directory contents
- Write (w): Can modify file contents or create/delete files in directory
- Execute (x): Can run file as a program or enter directory
These permissions apply to three categories:
- Owner (u): The user who owns the file
- Group (g): Users in the file's group
- Other (o): Everyone else
#Reading Permission Notation
When you run ls -l, you see permissions like this:
-rw-r--r-- 1 alice developers 1024 Feb 20 10:30 file.txt
drwxr-xr-x 2 alice developers 4096 Feb 20 10:30 mydir/
Breaking down -rw-r--r--:
- rw- r-- r--
| |   |   |
| |   |   +-- Other: read only (r--)
| |   +------ Group: read only (r--)
| +---------- Owner: read and write (rw-)
+------------ File type: - = regular file, d = directory, l = symlink#Numeric Permission Format
Permissions can also be represented as octal numbers:
- Read (r) = 4
- Write (w) = 2
- Execute (x) = 1
Each permission category is the sum of its permissions:
7 = 4 + 2 + 1 = rwx (read, write, execute)
6 = 4 + 2 + 0 = rw- (read, write)
5 = 4 + 0 + 1 = r-x (read, execute)
4 = 4 + 0 + 0 = r-- (read only)
0 = 0 + 0 + 0 = --- (no permissions)
So 755 means:
- Owner: 7 (rwx)
- Group: 5 (r-x)
- Other: 5 (r-x)
#Permission Categories
#Owner Permissions
The owner (usually the creator) has the most control. Owner permissions are the first three characters after the file type.
-rw-r--r-- alice developers file.txt
  ^^^
Owner permissions: read and write#Group Permissions
Users in the file's group have the permissions shown in the middle three characters.
-rw-r--r-- alice developers file.txt
     ^^^
Group permissions: read only#Other Permissions
Everyone else has the permissions shown in the last three characters.
-rw-r--r-- alice developers file.txt
        ^^^
Other permissions: read only#Changing Permissions
#Using chmod with Symbolic Notation
The chmod command changes permissions. Symbolic notation is human-readable:
# Add execute permission for owner
chmod u+x script.sh

# Remove write permission for group
chmod g-w file.txt

# Add read permission for other
chmod o+r file.txt

# Set exact permissions for owner
chmod u=rwx file.txt

# Add execute for all
chmod +x script.sh

# Remove all permissions for other
chmod o= file.txt#Using chmod with Numeric Notation
Numeric notation is faster for setting exact permissions:
# Set to 755 (rwxr-xr-x)
chmod 755 script.sh

# Set to 644 (rw-r--r--)
chmod 644 file.txt

# Set to 600 (rw-------)
chmod 600 secret.txt

# Set to 777 (rwxrwxrwx) - NOT RECOMMENDED
chmod 777 file.txt#Recursive Permission Changes
# Change permissions recursively
chmod -R 755 mydir/

# Change only files (not directories)
find mydir -type f -exec chmod 644 {} \;

# Change only directories (not files)
find mydir -type d -exec chmod 755 {} \;#Default Permissions and umask
When you create a file, the default permissions are determined by umask. The umask is subtracted from the default permissions:
- Default file permissions: 666 (rw-rw-rw-)
- Default directory permissions: 777 (rwxrwxrwx)
With umask 0022:
- Files: 666 - 022 = 644 (rw-r--r--)
- Directories: 777 - 022 = 755 (rwxr-xr-x)
# View current umask
umask

# Set umask for current session
umask 0077

# Set umask permanently (add to ~/.bashrc)
echo "umask 0077" >> ~/.bashrc#Changing Ownership
#Using chown
The chown command changes file ownership:
# Change owner
sudo chown alice file.txt

# Change owner and group
sudo chown alice:developers file.txt

# Change only group
sudo chown :developers file.txt

# Change owner recursively
sudo chown -R alice mydir/

# Change owner and group recursively
sudo chown -R alice:developers mydir/#Using chgrp
The chgrp command changes only the group:
# Change group
sudo chgrp developers file.txt

# Change group recursively
sudo chgrp -R developers mydir/#Recursive Ownership Changes
When changing ownership recursively, be careful:
# Change ownership of all files in a directory
sudo chown -R alice:developers /var/www/myapp

# Change ownership but preserve symlinks
sudo chown -R -h alice:developers /var/www/myapp

# Change ownership of files only (not directories)
find /var/www/myapp -type f -exec sudo chown alice:developers {} \;#Advanced Permissions
Beyond basic read, write, and execute, Linux has three special permissions:
#Setuid (Set User ID)
When setuid is set on an executable file, the program runs as the file's owner, not the user who executed it.
Numeric representation: 4 (added to the first digit)
-rwsr-xr-x  (4755)
  ^
  Setuid bit
Use case: Programs that need elevated privileges
# passwd command runs as root even when executed by regular users
ls -l /usr/bin/passwd
-rwsr-xr-x 1 root root 68208 Feb 20 10:30 /usr/bin/passwd

# Set setuid
chmod u+s /usr/bin/myprogram
chmod 4755 /usr/bin/myprogram
Security warning: Setuid programs are a common attack vector. Only use when necessary.
#Setgid (Set Group ID)
When setgid is set on an executable file, the program runs as the file's group. When set on a directory, new files created in that directory inherit the directory's group.
Numeric representation: 2 (added to the first digit)
-rwxr-sr-x  (2755)
     ^
     Setgid bit
Use case: Shared directories where files should belong to a specific group
# Create a shared directory
mkdir /var/shared
sudo chown root:developers /var/shared
sudo chmod g+s /var/shared

# New files created here will belong to 'developers' group
touch /var/shared/file.txt
ls -l /var/shared/file.txt
-rw-r--r-- 1 alice developers 0 Feb 20 10:30 file.txt#Sticky Bit
When sticky bit is set on a directory, only the file owner (or root) can delete files in that directory, even if others have write permission.
Numeric representation: 1 (added to the first digit)
drwxrwxrwt  (1777)
        ^
        Sticky bit
Use case: Shared temporary directories like /tmp
# Set sticky bit
chmod o+t /tmp
chmod 1777 /tmp

# Now only file owners can delete their files
ls -ld /tmp
drwxrwxrwt 10 root root 4096 Feb 20 10:30 /tmp#Special Permission Examples
# Set setuid
chmod u+s /usr/bin/myprogram
chmod 4755 /usr/bin/myprogram

# Set setgid
chmod g+s /var/shared
chmod 2755 /var/shared

# Set sticky bit
chmod o+t /tmp
chmod 1777 /tmp

# Remove special permissions
chmod u-s /usr/bin/myprogram
chmod g-s /var/shared
chmod o-t /tmp#Access Control Lists (ACLs)
#What are ACLs?
ACLs (Access Control Lists) provide fine-grained permission control beyond the basic owner/group/other model. They allow you to grant specific permissions to specific users or groups.
Use case: When you need to grant permissions to multiple users without creating a group, or when permissions don't fit the standard model.
#Setting ACLs
# Grant read permission to a specific user
setfacl -m u:alice:r file.txt

# Grant read and write to a specific user
setfacl -m u:alice:rw file.txt

# Grant permissions to a group
setfacl -m g:developers:rx file.txt

# Set default ACL for new files in directory
setfacl -d -m u:alice:rw mydir/

# Remove specific ACL
setfacl -x u:alice file.txt

# Remove all ACLs
setfacl -b file.txt#Viewing ACLs
# View ACLs for a file
getfacl file.txt

# View ACLs recursively
getfacl -R mydir/#ACL Use Cases
Scenario 1: Multiple developers need access to a project directory
# Instead of creating a group, use ACLs
setfacl -m u:alice:rwx /var/www/project
setfacl -m u:bob:rwx /var/www/project
setfacl -m u:charlie:rx /var/www/project  # Read-only for charlie
Scenario 2: Shared log directory where different services need access
setfacl -m u:nginx:rw /var/log/shared
setfacl -m u:mysql:rw /var/log/shared
setfacl -m u:postgres:rw /var/log/shared#Sudo and Privilege Escalation
#Understanding sudo
sudo (superuser do) allows authorized users to run commands as another user (usually root) without knowing the root password. It's the safe way to perform administrative tasks.
Why sudo instead of root login?
- Accountability: Logs show which user ran which command
- Granular control: Different users can have different sudo permissions
- Security: Users don't need to know the root password
- Audit trail: All sudo commands are logged
#Configuring sudoers
The sudoers file (/etc/sudoers) controls who can use sudo and what they can do. Always edit it with visudo, not a regular editor:
# Edit sudoers file (always use visudo)
sudo visudo

# Add user to sudoers (full sudo access)
# Add this line to /etc/sudoers:
alice ALL=(ALL) ALL

# Allow specific command without password
# Add this line:
alice ALL=(ALL) NOPASSWD: /usr/bin/systemctl

# Allow group to use sudo
%developers ALL=(ALL) ALLSudoers syntax: user HOST=(runuser) COMMAND
user: Username or group (prefix with % for groups)HOST: Which hosts this applies to (usually ALL)runuser: Which user to run as (usually ALL)COMMAND: Which commands are allowed (usually ALL)
#Using sudo Safely
# Run command as root
sudo systemctl restart nginx

# Run command as specific user
sudo -u alice whoami

# Run command as root with environment variables
sudo -E mycommand

# List sudo permissions for current user
sudo -l

# Edit file as root
sudo nano /etc/nginx/nginx.conf

# Run interactive shell as root
sudo -i#Sudo Best Practices
- Use sudo, not root login: Never log in as root directly
- Principle of least privilege: Grant only necessary permissions
- Use NOPASSWD sparingly: Only for commands that don't need security
- Audit sudo usage: Check
/var/log/auth.logfor sudo commands - Use groups: Manage permissions via groups, not individual users
- Specific commands: Allow specific commands, not all commands
- Regular review: Periodically review sudoers configuration
Example: Secure sudoers configuration
# Allow developers to restart services
%developers ALL=(ALL) NOPASSWD: /usr/bin/systemctl restart nginx, /usr/bin/systemctl restart mysql

# Allow ops team full sudo
%ops ALL=(ALL) ALL

# Require password for sensitive commands
alice ALL=(ALL) /usr/bin/passwd, /usr/bin/useradd, /usr/bin/userdel#File Permissions in Practice
#Web Server Permissions
For a web application served by nginx:
# Web root owned by root, readable by nginx
sudo chown root:root /var/www/myapp
sudo chmod 755 /var/www/myapp

# Application files readable by nginx
sudo chown root:root /var/www/myapp/index.php
sudo chmod 644 /var/www/myapp/index.php

# Writable directories for uploads
sudo chown nginx:nginx /var/www/myapp/uploads
sudo chmod 755 /var/www/myapp/uploads

# Configuration files readable only by root
sudo chown root:root /var/www/myapp/config.php
sudo chmod 600 /var/www/myapp/config.php#Application Directories
For a typical application:
# Application directory
chmod 755 /opt/myapp

# Source code (readable by app user)
chown appuser:appuser /opt/myapp/src
chmod 755 /opt/myapp/src

# Configuration (readable only by app user)
chown appuser:appuser /opt/myapp/config
chmod 700 /opt/myapp/config

# Logs (writable by app user)
chown appuser:appuser /var/log/myapp
chmod 755 /var/log/myapp#Log Files
# Log directory
sudo chown root:root /var/log/myapp
sudo chmod 755 /var/log/myapp

# Log files (readable by root and app user)
sudo chown appuser:root /var/log/myapp/app.log
sudo chmod 640 /var/log/myapp/app.log#Configuration Files
# Sensitive configuration (readable only by owner)
sudo chown root:root /etc/myapp/database.conf
sudo chmod 600 /etc/myapp/database.conf

# General configuration (readable by all)
sudo chown root:root /etc/myapp/app.conf
sudo chmod 644 /etc/myapp/app.conf#Common Mistakes and Pitfalls
#Using 777 Permissions
Mistake: Setting permissions to 777 (rwxrwxrwx) to "fix" permission issues
# DON'T DO THIS
chmod 777 /var/www/myapp
chmod 777 /etc/config.conf
Why it's bad:
- Everyone can read, write, and execute
- Massive security vulnerability
- Allows anyone to modify critical files
- Violates principle of least privilege
How to avoid it: Understand what permissions are actually needed and set them appropriately.
#Incorrect Ownership
Mistake: Files owned by wrong user, causing permission denied errors
# Application files owned by root instead of app user
ls -l /var/www/myapp/index.php
-rw-r--r-- 1 root root 1024 Feb 20 10:30 index.php

# nginx can't write to uploads directory
ls -ld /var/www/myapp/uploads
drwxr-xr-x 2 root root 4096 Feb 20 10:30 uploads
How to avoid it: Ensure files are owned by the correct user/group for the application.
#Forgetting umask
Mistake: Creating files with overly permissive default permissions
# Default umask creates world-readable files
umask
0022

# New files are 644 (rw-r--r--)
touch secret.txt
ls -l secret.txt
-rw-r--r-- 1 alice alice 0 Feb 20 10:30 secret.txt
How to avoid it: Set appropriate umask for sensitive operations.
#Overly Permissive sudo Rules
Mistake: Allowing users to run any command with sudo
# DON'T DO THIS
alice ALL=(ALL) ALL

# Better: Specific commands
alice ALL=(ALL) NOPASSWD: /usr/bin/systemctl restart nginx
Why it's bad: Users can run any command as root, including dangerous ones.
How to avoid it: Grant only necessary sudo permissions for specific commands.
#Security Best Practices
#Principle of Least Privilege
Grant users and processes only the minimum permissions they need:
- Users should not be root
- Applications should run as dedicated users
- Files should not be world-readable unless necessary
- Directories should not be world-writable unless necessary
# Good: Minimal permissions
-rw------- 1 appuser appuser config.conf
drwxr-xr-x 2 appuser appuser /opt/myapp

# Bad: Overly permissive
-rw-rw-rw- 1 appuser appuser config.conf
drwxrwxrwx 2 appuser appuser /opt/myapp#Regular Permission Audits
Periodically check for permission issues:
# Find world-writable files
find / -type f -perm -002 2>/dev/null

# Find world-readable sensitive files
find /etc -type f -perm -004 2>/dev/null

# Find setuid files
find / -type f -perm -4000 2>/dev/null

# Find files owned by deleted users
find / -nouser 2>/dev/null#Monitoring Permission Changes
Use tools to detect unauthorized permission changes:
# Monitor file changes with auditd
sudo auditctl -w /etc/passwd -p wa -k passwd_changes

# View audit logs
sudo ausearch -k passwd_changes#Secure File Handling
When creating sensitive files:
# Create file with restrictive permissions
touch secret.txt
chmod 600 secret.txt

# Or use umask
umask 0077
touch secret.txt  # Will be 600

# For directories
mkdir -p secure_dir
chmod 700 secure_dir#When to Use Advanced Permissions
#Setuid for System Tools
Use setuid when a regular user needs to run a privileged command:
# passwd needs to modify /etc/shadow (root-only)
ls -l /usr/bin/passwd
-rwsr-xr-x 1 root root 68208 Feb 20 10:30 /usr/bin/passwd

# ping needs raw socket access (root-only)
ls -l /usr/bin/ping
-rwsr-xr-x 1 root root 64424 Feb 20 10:30 /usr/bin/ping
When to use: Only for trusted system utilities that genuinely need elevated privileges.
#Setgid for Shared Directories
Use setgid when files created in a directory should belong to a specific group:
# Shared project directory
mkdir /var/projects/myproject
chown root:developers /var/projects/myproject
chmod g+s /var/projects/myproject

# New files automatically belong to 'developers' group
touch /var/projects/myproject/file.txt
ls -l /var/projects/myproject/file.txt
-rw-r--r-- 1 alice developers 0 Feb 20 10:30 file.txt
When to use: Shared directories where consistent group ownership is important.
#ACLs for Complex Scenarios
Use ACLs when standard permissions don't fit:
# Multiple users need different permissions
setfacl -m u:alice:rwx /var/shared
setfacl -m u:bob:rx /var/shared
setfacl -m u:charlie:rw /var/shared
When to use: Complex permission requirements that don't fit the owner/group/other model.
#Key Takeaways
- Users and groups are the foundation of Linux security: Every process runs as a user, and permissions are enforced based on user identity
- Permissions have three categories: Owner, group, and other—each with read, write, and execute permissions
- Numeric notation is faster: 755, 644, 600 are common permission patterns
- Ownership matters: Files must be owned by the correct user for applications to work
- Principle of least privilege: Grant only necessary permissions, never use 777
- sudo is safer than root login: Use sudo for administrative tasks, not root login
- Advanced permissions exist for specific use cases: Setuid, setgid, and ACLs solve complex permission scenarios
- Audit permissions regularly: Check for overly permissive files and unauthorized changes
#Next Steps
- Create users and groups: Practice creating users and groups on your system
- Experiment with permissions: Use chmod and chown to change permissions
- Audit your system: Find overly permissive files using the commands in this episode
- Configure sudo: Set up sudo rules for your team or use case
- Continue the series: Move to Episode 4: Shell & Bash Fundamentals to learn shell scripting
Understanding permissions is critical for Linux security. Every production incident involving "permission denied" or "permission too open" traces back to these concepts.
Ready for the next episode? Continue with Episode 4: Shell & Bash Fundamentals to master the shell and begin your journey into bash scripting.